Category Archives: Quilting

Market Making

Those of you who know my antics over on Instragram have seen me create three blocks recently.  I was lucky enough to get some Andover chambrays and the new Alison Glass handmade.  I think these may be heading to market in October.  Wish them luck.

This is after they were quilted, bound, and I even put hanging sleeves on them.  I mailed them off to the big city this morning.

IMG_5559


And here are the individual pieces.  For those of you who were interested in the bottom block, I’ve included the templates for those.  The PDF has both a 6 inch version as well as the pieces for the 24 inch block that I constructed.  I even did a coloring sheet.  The file is after these pictures.

IMG_5525 IMG_5531 IMG_5539


And this file is for you Rainbowkelf.

Rainbowkelf Block_NEW


Space Dust Quilt Along – Week 6 – Row Five

Well heading into the home stretch!  This is the next to the last row that comprises the body of the space dust!

This row uses templates EE through LL.  Have those ready to go along with your fabric?  Then get to it and get it done!  John will be back next Friday to get week 7 and Row 6 all finished up.  Then on to the sides and tops and voila, space dust.

Here’s my indelible version with Row Five attached.

IMG_5085 (2)

John announced another giveaway last week – one lucky winner will win a half-yard bundle of Pure Elements solids, courtesy of Quilter’s Square and Art Gallery Fabrics. And I get to draw the winner!

Cue the music…and the winner is…See_Marj_Create!  Please DM me on IG or comment here with your details and I will get them to Quilter’s Square!

Don’t forget to check the blogs next Friday for Week 7 Row Six – John will be hosting and announcing another great giveaway!

And for those of you who found you love this pattern like I did, make another one!  Here’s my Version 2.

Photobomb courtesy of sister Xena Hawthorne!


Space Dust Quilt Along Begins!

The Space Dust Quilt Along has begun.  John has posted a great introduction with some helpful tips as we get ready to go.  You can find his post here.

http://www.quiltdad.com/2014/08/welcome-to-space-dust-quilt-along-week-1.html

Don’t forget to have your rotary cutter, rulers, and pins (or a glue stick if you are so inclined) ready to go.  I will be hosting next week where we will be making the first row.

I am looking forward to all the great creativity that this brings out in those of you who are quilting along!

And I added a Space Dust Quilt Along menu item to bring all the posts under one umbrella and save you some hunting time!

IMG_5076

Indelible Mini

Well, as many of you know from Instagram I have fallen head over heals for Indelible.  I came across it when I was shopping at CrimsonTate and bought two pieces from the line that I just had to have.  If you have not seen the line, you can check it out at Katarina Roccella‘s new line for Art Gallery Fabrics, Indelible.

And you know that I have a LOVE of paper piecing, so of course I went into EQ7 and used two blocks I thought were a great medium for the fabric.  I made two different blocks using the Indelible fabric along with some pieces from Makower’s Sansui line and Free Spirit Denyse Schmidt solids.


IMG_4834


Now what to do?  Hmmmm, why not take some more of the Spirodraft (the dark grey, my favorite in the line!) and slash it up.  I added two more blocks to get to a 28 inch square mini.  I quilted it by outlining the block shapes and by following some of the lines in the grey fabric.

IMG_4866


And the final product has a happy home in my bedroom.  Yes, I love the grey aquaish combination just a little!

IMG_4884

The Space Dust Quilt-Along


And here it is!  The event you have been waiting for.  The Space Dust Quilt-Along!


As usual, I was spending more time on Instagram than I should (I would get so much more sewing done!) and along came this post from John Adams (Quiltdad) and Kela (from Quilter’s Square) and some others.

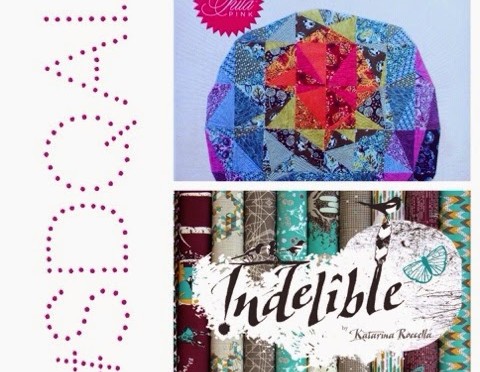
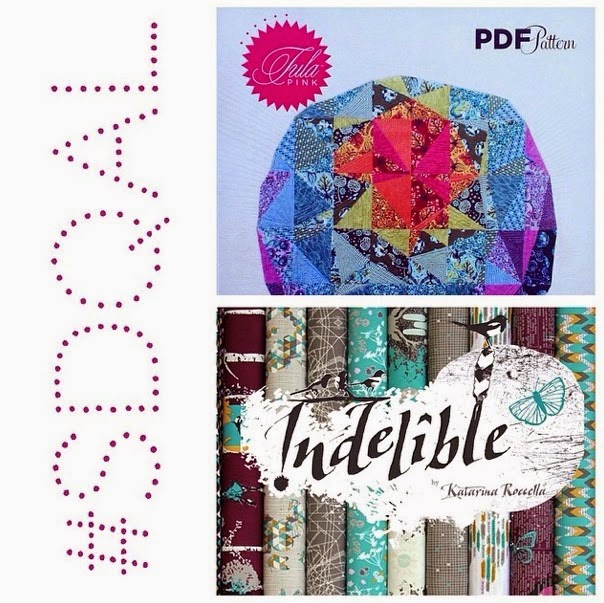
We were gushing about Katarina Roccella‘s new line for Art Gallery Fabrics, Indelible.

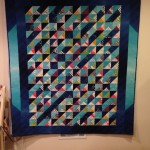
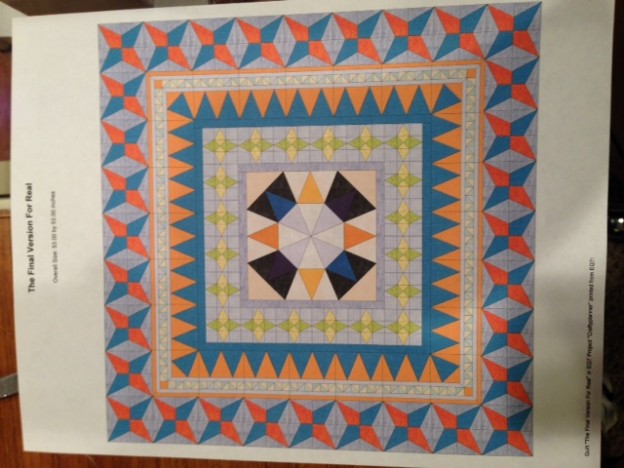
John was also sharing that Tula Pink’s Space Dust quilt was on his quilter’s bucket list, and that he was contemplating starting it soon.  Space Dust made with Indelible?  John mentioned it would be pretty damn epic.  Who was I to argue?

Others agreed. A quilt-along was mentioned. And John volunteered to host it (though I think he was actualAnly told to, only IG knows for sure).

And because he has an awesome beard, I agreed to co-host!  Kela offered to pull together quilt kits (at a discounted price!), John asked Tula to offer a pattern discount to participants (she agreed!), and the Space Dust Quilt-Along (#SDQAL) was born.  John and I are looking forward to seeing what you all create as you join us on this adventure!


The Pattern

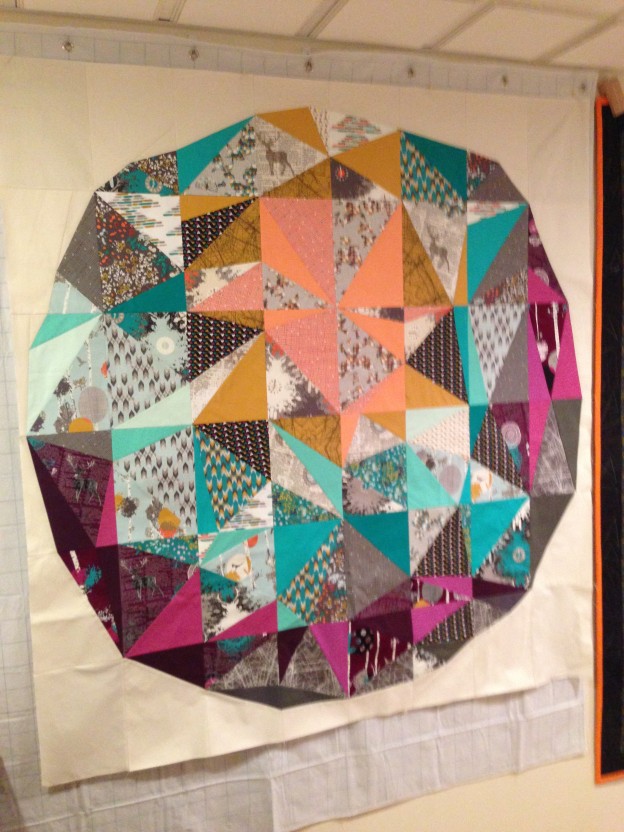
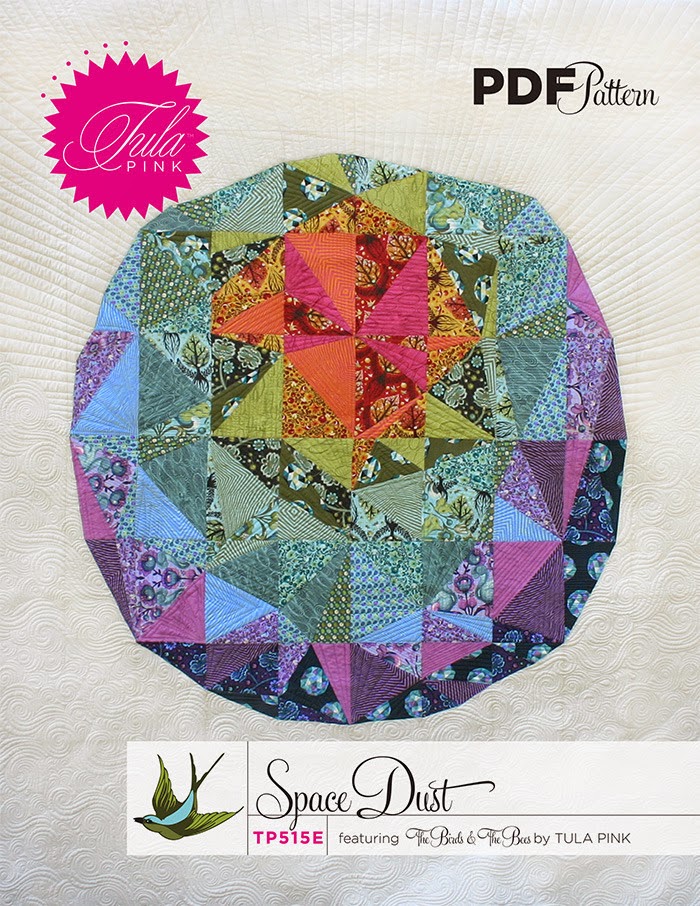
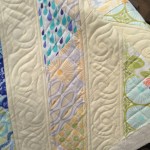
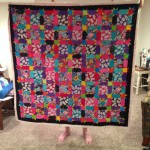
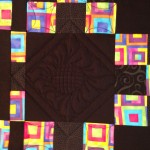
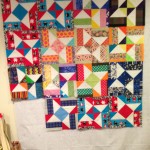
The Space Dust pattern by Tula Pink is a paper-pieced (foundation pieced) pattern. (Not English paper piecing — aka hand work — as some of you have already asked.) If you’re unfamiliar, uncomfortable, or inexperienced with paper piecing and want to practice / get better, this is a GREAT pattern for that. It’s fairly straightforward and Tula’s instructions, as always, are amazing.

The PDF pattern is listed at $24.95 but Tula is offering 15% off for SDQAL participants. Just enter SDQAL as the discount code.

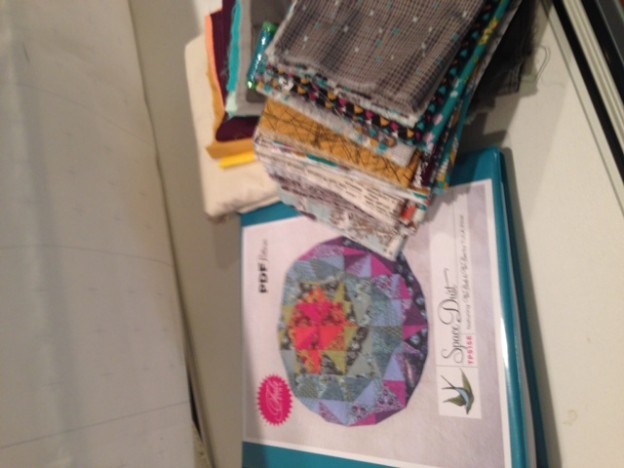
As a reference, here are the fabric requirements for the pattern:

  • Background fabric: 5 yards
  • Color fabrics: 22 quarter-yard cuts of your choice
  • Backing: 8 yards
  • Binding: 3/4 yard
  • The quilt finishes at 88″ x 96″.

Link to purchase the Space Dust quilt pattern.

The Fabric

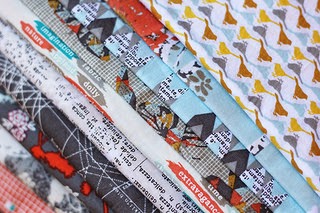
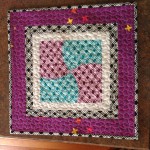
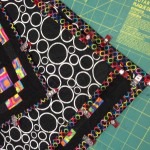
The quilting community is all abuzz with talk about Katarina Roccella‘s debut line with Art Gallery Fabrics, Indelible.  The fabric is sublime!  Typical of AGF, the fabric has a great feel.  While I did not get to see it at Quilt Market in Pittsburgh like John did, I encountered it during a CrimsonTate sale and bought two of my favorite pieces.  I’ll post a separate blog on that beauty!  I think John made a perfect choice since the prints and colors of the line will be an amazing complement to the Space Dust pattern.

The pattern calls for 21 quarter-yard cuts of prints, so you can of course use any fabric you want for the quilt-along. It is not a requirement that you make your quilt from Indelible!

If, however, you would like to use the line, Quilter’s Square in Lexington, KY is making quilt kits and offering them at a discounted price. Kits are normally priced at $125.75, but are being offered for $100.00 for SDQAL participants.

Link to purchase quilt kits from Quilter’s Square.

The Schedule

We’ll be starting the quilt-along in a few weeks to give everyone enough time to collect their supplies, prepare their materials, etc. John and I will be alternating posts on our blogs (but I’ll always link to his posts so that you won’t miss anything.) The initial schedule is posted below. You will see that we will be posting on Fridays — making it easier on you weekend warriors! — and tackling the pattern row by row.

  • Friday, 8/1 – Gathering materials, printing pattern, cutting pattern pieces, brush up on paper piecing, general prep
  • Friday, 8/8 – Row 1
  • Friday, 8/15 – Row 2
  • Friday, 8/22 – Row 3
  • Friday, 8/29 – Row 4
  • Friday, 9/5 – Row 5
  • Friday, 9/12 – Row 6
  • Friday, 9/19 – Row 7
  • Friday, 9/24 (MY 40TH BIRTHDAY!) – Row 8 & finishing up

A note about quilt-alongs: the posts will always remain live on our blogs. If you need to get started a few weeks (or months or years!) late, no worries. You can always come back and follow the posts. Likewise, if you’re a Speedy Sally and want to jump ahead, you are always free to do so. The quilt-along is simply a place for encouragement and fun picture-sharing to keep everyone motivated throughout.

Of course, it wouldn’t be a party without giveaways! Be on the lookout for fun giveaways to be offered throughout the quilt-along for anyone participating.

If you’re participating and you’re active on social media, please be sure to share all of your progress on Instagram and Facebook with the hashtag #SDQAL. Feel free to start now with photos of your fabric ideas, your prep work, paper piecing tips, questions and requests for help, etc.

So, who’s in? My only remaining question for John is do we get cake?

Hacking on a sunday…but in a fabric kind of way…

So I did not do much in the way of sewing on Saturday as it was a very nice day and there were multiple errands to run, including dropping off my Bernina for service (when I get that very polite message, I always head it into the shop) and running over to the LQS to get some feedback on the piece I am working on for them (I will do another post on that, I promise).  I added another border to that project!  Then I had to run the dogs to their spa treatment, so they spent a lovely time getting baths and having nails painted and the day was pretty much gone.  And had gotten away from me!

So Sunday I decided that I really needed to use up some pieces from the LQS project, including a boatload of 3 inch squares of Kona in a variety of colors.  I overcut.  Quite a bit.  I also had some fairly large pieces of Lucky Penny in white.  And so I started to hack.  And slash.  And hack some more.

I cut white pieces into 7 1/2 squares (that was the final choice – I started at 8 1/2 but they were too large).  I then randomly picked 3 of the 3 inch Kona squares for the corners.  Why only 3 corners?  Why not!

The 3 inch squares were placed on the corners and I drew diagonal lines and sewed on the line.  I then cut 1/4 inch from the sewn line and pressed and Voila, a block.  I made a total of 16 blocks this way.

Placement?  Hmmmm…I decided to have the first row with all the empty corners (no 3 inch piece on it) oriented to the bottom left, the next row pointed it to the upper right, and then bottom left, then upper right!  I got two distinct patterns this way, a full square and an hourglass thingy.

So it was a little small, and I added a 3 inch by 7 1/2 inch strip to make a first border, placing 3 inch Kona squares on the strip ends as needed to place them in spots where they finish up the secondary patterns.  I sewed and trimmed these the same way as the large squares – diagonal line, sew on line, and trim and press.  Once that border was complete, I added a second border of 3 inches by length, adding a 3 inch square on the ends.  For the top and bottom strips, I added a 3 inch white square to make the length fit properly.

I then sewed remaining 3 inch Kona pieces together to get a very colorful border.  I have made a back and the piece is pinned and ready to quilt.  I will update as soon as it is all done!

hack sunday twohacking sunday one


Sunnyside Asymmetrical Diamonds

I admit I spend far too much time quilting and playing around with my virtual friends on Instagram for my own good.  I have found so much inspiration through IG!  Those of you who might know me over on IG know that I post a lot over there, especially about my ‘creative process’ and less time over here on my blog.  You also know that most of my quilting is done with fabric that has inspired me and that I usually focus on a particular fabric in my work and don’t ‘mix it up’ as much as some folks might do.  That’s just my style!  For this piece, I again used Sunnyside by Kate Spain (you can find my Wonky Stars using this line on another blog post).

I started with an Asymmetrical Diamonds pattern I found over on Robert Kaufman fabrics website.  You can find the pattern here:   http://www.robertkaufman.com/quilting/quilts_patterns/asymmetrical_diamond/#color:1.  As you will see there, the Kaufman pattern is inspired by Lisa Roddy’s quilt on her blog, Shiner’s View. you can view the original quilt here.

And I will sketch out my recollections of the process (I should probably take notes when I make something, but I usually just go with the flow and forget what I’ve done to get to the finish!).  I used charm packs of Sunnyside along with some pale yellow solid (I think it is Kona, but don’t quote me – I know I hit up 3 shops to find the color I wanted, dutifully carrying my charm packs with me).

The pattern is I think fairly straightforward and relatively easy to put together as it is HST driven.  I did add some additional length and width to my piece to get the size and look that I wanted.  My piece finishes at 55 square.

The piece was quilted by my awesome long arm quilter http://kappeskreations.com/ – she has done a lot of my pieces and for this she did some amazing scrollwork in the pale yellow and some Angela Walters inspired wonky triangles in the Sunnyside fabric.

And so you know, I am a happy little evildemondevildog because Kate Spain saw this on Instragram and regrammed it.  I could not ask for a better affirmation on my work than having it acknowledged by the fabric designer who inspired it.  Thank you!

Enough fanboy gushing – here are pictures of the finished piece (I used some yardage of Sunnyside for binding) and some detail shots posted elsewhere on my blog.  Now all in one place for your viewing pleasure.

Love Kate Spain.  Love the quilting!
Love Kate Spain. Love the quilting!
Sunnyside Asymmetrical Diamonds Kate Spain
This was prebinding out on the deck. I was so excited to get this back from the long arm adventure.
Sunnyside Asymmetrical Diamonds
The finished 55 x 55 piece.

IMG_4019


Welcome to May! What I have been up to lately…

I will hopefully get around to blogging about each of these if I have not already!  In the meantime, enjoy the show!


Making a Medallion

I confess that I have wanted to make the Marcelle Medallion out of the Liberty Love book for a while now.  I have seen many of them on Instagram and was really getting excited about attempting my own.  And then I thought, hey, why not just assemble your own.

So I broke out the trust Electric Quilt 7 handbook and figured out (finally after all these years!) to lay blocks into borders and had at it.  The design came out something like this:

Designed in Electric Quilt 7.


And so my work began.  I am using Carolyn Friedlander’s Botanics line from Robert Kauffman along with one of her pieces from Architextures.  Her fabric lines are fantastic.  Great color and designs.

The center medallion was relatively easy to get done.  Morning Star.

IMG_3492


Once the center was done, I started to work on the subsequent borders.  I had a couple of design struggles during the process, including how scrappy to go in a couple of sections.

IMG_3610IMG_3694IMG_3715


And yesterday I started to create the final border sections.  I was originally going to make a block called the Priscilla but it turned out to be a little off kilter and has y seams, so a lot of work.  I decided to go with a simple hummingbird block (no Y seams required though!).  I was going to alternate between the dark grey and light backgrounds, but have decided to go with the light background.  I’ve also decided to scrap it up again and mix in the variety of fabrics that were used in the Arkansas star block and the handkerchief edging.  I only have to make 32 of them!  I will update this post when I have the top all finished up!

And here it is the middle of May and I am just getting around to finishing up this post, though the piece has been done for weeks!  Ack!  So little time.  Not only was I happy with the top, I got all fancy with my Bernina stitches and came up with some great details for the quilting.

IMG_3819 IMG_3839 IMG_3826 IMG_3823


After all the quilting, this was the final result (excuse the man toes, someone needs to wear shoes when he holds quilts for me).

IMG_3841 IMG_3842


Twisted Log Cabin

When I was making my permutations quilt (http://evildemondevildog.com/2014/01/25/a-study-in-permutations/) I did some block exploration.  One of the blocks I made was a twisted log cabin.

image


The block found a new home and fame and fortune on Instagram!  A couple of folks have asked about the pattern.  So here is an experiment since I have never tried posting a pdf file to my blog!

The block is from Electric Quilt 7 – I have been using EQ for quite some time (okay, ever since it first came out!) and I love the versatility of the blocks, designs and layouts that can be accomplished.  I have attached a six and seven inch version of the pdf file for your use (disclaimer – I checked EQ7s write up and web page and they say the blocks are not copyright – there are a couple of exceptions and this was not one of them).

Twisted Log Cabin Six Inch Block

Twisted Log Cabin Seven Inch Block